Showing posts with label Giveaways. Show all posts

Friday, January 6, 2012

Friday Night News

Holy Cow! Have you seen?

I have snazzy, new SOCIAL MEDIA ICONS!! So much better than the old, drab and boring, grey ones I was sporting. Aren't they cheery?

Michelle at The Momma Bird did them up for me! Can I say what a gem that girl is to work with? Quick, honest and does a ridiculously good job! If you're needing some new looks for 2012 on your blog she's definitely the one to hit up. Plus, if you haven't you should really check out her blog too, you won't be sorry.

And just for the record, I'm on Bloglovin' now - so go ahead hit that little "bl" button over there on the left and follow me there...go on show that cute little button some love - you know you want to!

And last but not least....

WHAT DO YOU MEAN YOU HAVEN'T ENTERED THE BIG GIVEAWAY YET?

Here are some of the items up for grabs to ONE lucky winner...

Target Gift Card
8x10 Photo Canvas
Starbucks Gift Cards (yup, more than 1!)
Ad space
8x10 Family Name Canvas
Scentsy Burner
Custom Beaded Knot Necklace
Handmade Headbands

Gift Certificate's to 3 Etsy Shops
Hair Accessories with coordinating Rings

Cosmetic Bag from Thirty One
Handmade Cellphone Pouch
Customizable Blog Template

YOU could be that ONE lucky winner!
And you can enter here:

Photobucket.
Good Luck!

Friday, October 7, 2011

Thanks, Welcome, And Nothing Else Matters is Here with a Giveaway!


Good Morning all my amazingly awesome lovelies! 
I want to thank {and WELCOME!} everyone that joined in on our Tag-Along Thursday Blog Hop.
Miss Mommy, And Nothing Else Matters and I are THRILLED with the turnout!
I browsed around for hours last night totally engrossed in all these new reads.
You ladies are a talented bunch!

Today I wanted to give you a chance to get to know Em {And Nothing Else Matters} a little better.
She was a co-host of the hop yesterday, so it seemed fitting that I properly introduce her to you.
She's here with a little about herself, a tutorial AND a giveaway!
Triple whammy!
Hope you enjoy.
Have a lovely Friday.
_________________________________________________________________
Hi all! I am so thrilled to be here with you all today! I love Katie and I absolutely adore her fantastic blog. Its one of the blogs I read with my morning coffee. Every. Single. Day. So you can imagine how happy I was when she gave me the opportunity to guest post on her awesome blog! 
I have a super fun bow headband tutorial to share with you today, but first let me properly introduce myself.
My name is Em and I blog over at And Nothing Else Matters
I am a happily married mum of two from Australia. Yep that's right I'm an Aussie. 
The hubby joined the Air Force last year so I am navigating the new world of being a defence wife. I blog about the highs and lows and all the fun in between of juggling marriage and motherhood with distance and demands. The loneliness and hardtimes that came with this whole new lifestyle was one of my main reasons for starting my blog. And I am so glad I did.
I love discovering new blogs and getting to know the awesome people behind them, so please come on over to And Nothing Else Matters and say hi! I also have a fun Etsy Shop where I sell gorgeous delights like
 this
Floral Ruffled Love Tote Bag

and this

Leather and Lace Headband

and this.

Ruffled Fabric Sunglasses Case

Come take a look!


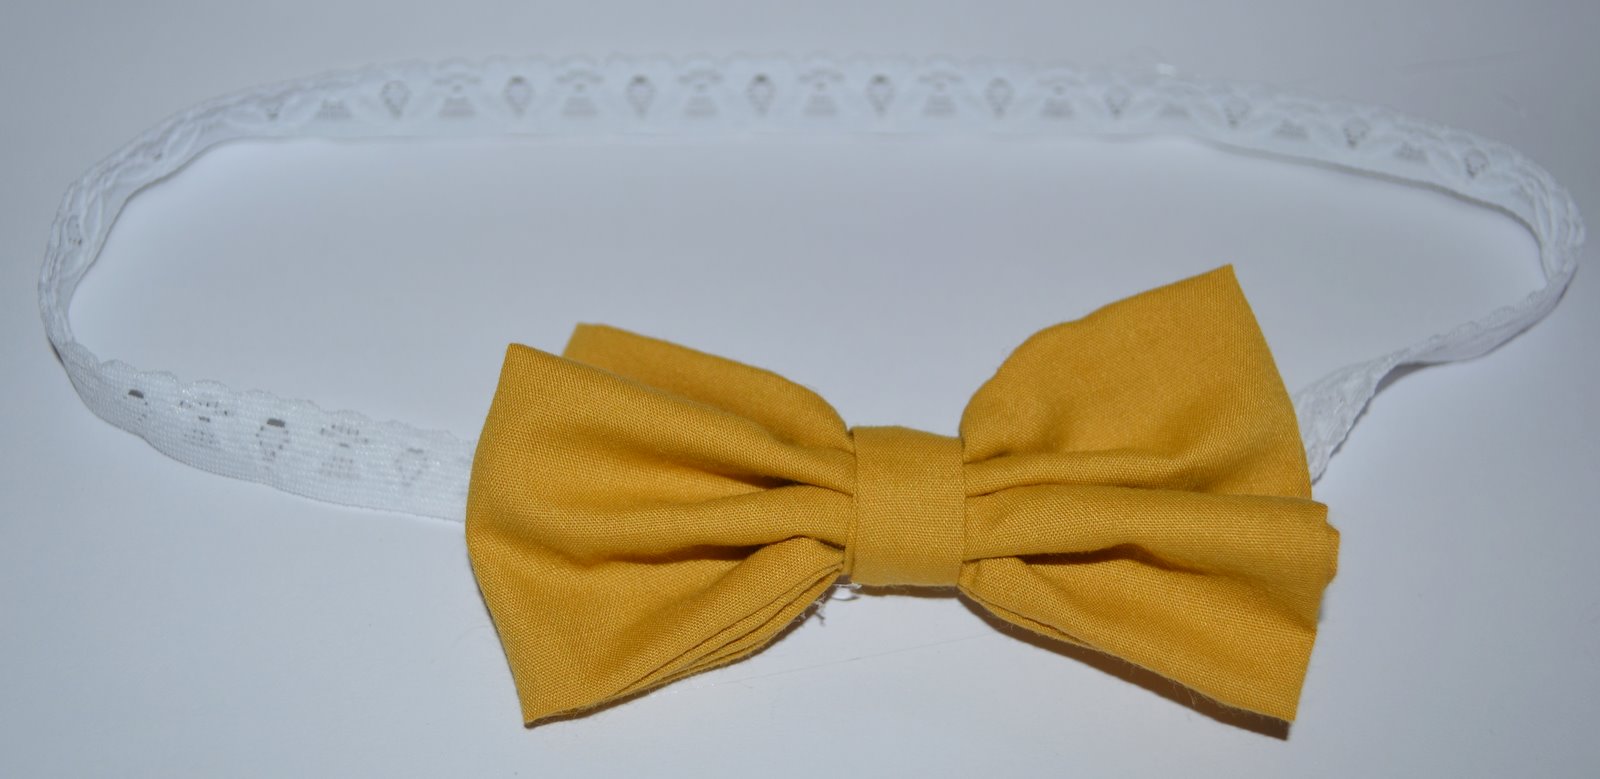
Now onto the fun stuff. See that awesome cute headband I'm wearing in my photo? Yeah, I love it too. So I guess it's a good thing I'm going to show you how to make one of your own. 

Here's what you'll need


3 1/2 inch x 16 inch piece of fabric
3 1/2 inch x 1 inch piece of fabric
1 x 20 inch piece of headband elastic
Hot glue gun
Sewing machine, or you could hand sew the edges. Or you could even hot glue the edges!

Here we go. Firstly fold the large piece of fabric in half and sew along the three open edges, leaving an opening about an inch and a half wide for turning.


Turn out the fabric. It will look like this below.


You will see the opening. You can either stitch closed or simply hot glue closed. Nice and quick!

Next take your length of elastic and hot glue the ends, overlapping by about an inch.


Now take the small piece of fabric. Fold the long edges towards each other and hot glue down. It should look kinda like a tube.


Now fold the large piece of fabric in half again and pinch together from the centre.


Add a glob of glue to the centre of the back of the bow and wrap the small piece of fabric around it (making sure the overlap side is facing inwards).


Glue the partially wrapped bow onto the overlapping section of the elastic headband.


Continue to wrap the strip around the centre, finishing at the back of the headband. It will look like the picture below.


And ta da you are done!


Isn't it gorgeous! Have fun making it, make sure you show me some pictures of your creations!

Because I love you all I have a giveaway and a special discount code for y'all to use LONG1 which is for a huge 30% off. Get it quick its only valid until this giveaway ends. You don't want to miss out! 
Now onto the giveaway. You have the chance to pick any fabric flower brooch from my shop. Some more super cute color combos are coming to the shop soon.
Dark Purple Fabric Flower Brooch Pin

Multi Coloured Fabric Flower Brooch Pin

Dark Purple and Dark Grey Fabric Flower Brooch Pin

Rules for Giveaway:
EXTRA ENTRIES:
Head to Simply Nothing Else and tell us your fave item
Tweet and/or Facebook about this giveaway

The Lucky Winner will be drawn on Monday at 8pm est!

Thanks so much again Katie for having me! 
Don't forget to stop by my blog and say hi!

Thursday, September 22, 2011

Welcome, Made by Munchie's Mama. Thanks for the Sweet Giveaway!


AND THE WINNER OF MADE BY MUNCHIE'S MAMA COCKTAIL RING IS.....
{drum roll please!!!}
Per random.org:
Comment #15
LISA!!!
Congrats!! Please be sure to contact me within 48 hours!


It's Thursday -Yahoo! That means I {we} have almost made it through this CRAZY week.

I haven't been around much to post this week due to work,
but I have a great bloggy bud that stepped up to the plate to guest post for me tonight. 

She's cute, she's sweet, and the things she makes in her Etsy shop are to die for.
Talk about talent!
Let me tell ya, I ALMOST want to have another baby so
she can crochet me some little baby goodies ;)

Who is she?? 
She's MADE BY MUNCHIE'S MAMA, also known as Summer.

I can't wait for you guys to meet her...plus she wrote up a great tutorial for us
on how to make a burp cloth. Maybe that's another omen that I should have second little one?

And, just when you thought it couldn't get any better,
Summer is also giving away one of her handmade cocktail rings.
LOVE HER!

Ok, enough with the small talk, take it away Summer!

_________________________________________________________
Hey there Punkin' Heads and Dooda Loo's readers!  
I am so excited to be guest posting for Katie today.  
She is such an amazing woman and so kind and thoughtful, 
not to mention that her blog is super FAB!  
My name is Summer and I have a blog called Made By Munchie's Mama


We lovingly refer to our oldest son as Munchie 
so Katie and I totally share a love for nicknames.   
I am so excited to share this burp cloth tutorial with you all. 

 It is so simple takes hardly anytime at all. 
These make a great little shower gift when you need 
something on the fly and you could totally use 
the scraps to make some adorable bows!  
Here we go...

 Supplies: 1 yard of cotton flannel {I used 1/2 yard each of coordinating patterns}, your favorite burp cloth to use as a pattern {or you can cut out a pattern with paper}, I love to use a rotary cutter and self healing mat, but scissors would work just fine.

 Place 2 pieces of material together right sides out 
and put your "pattern" on top.

 Use your rotary cutter to cut around your pattern.  
You can get about 4 burp cloths out of 1 yard of fabric, 
just depending on what the size of your pattern is.

 Pin your 2 pieces of material together so 
that they don't shift during sewing.

 Sew around the edge leaving about 1/4 inch seam allowance for fringe.  You can do a straight stitch or something fun like my zig zag.  You can even get fancy and use different color thread for the spool and bobbin to make different colors on top and bottom.

 Now you have 4 burp cloths that are sewn together.  
If you stop here, you will have a stringy mess on the edges 
after a wash or two.

 To avoid stringy mess mentioned above,  snip little cuts all around the outside of the burp cloth about 1/4 inch apart.  This makes a cute little fringed edge.

 And there you have it.  So simple: no turning inside out, no ironing, just cut, pin, stitch, and snip!

Here is a close up of the cute fringed edge.

And now on to the good stuff!  
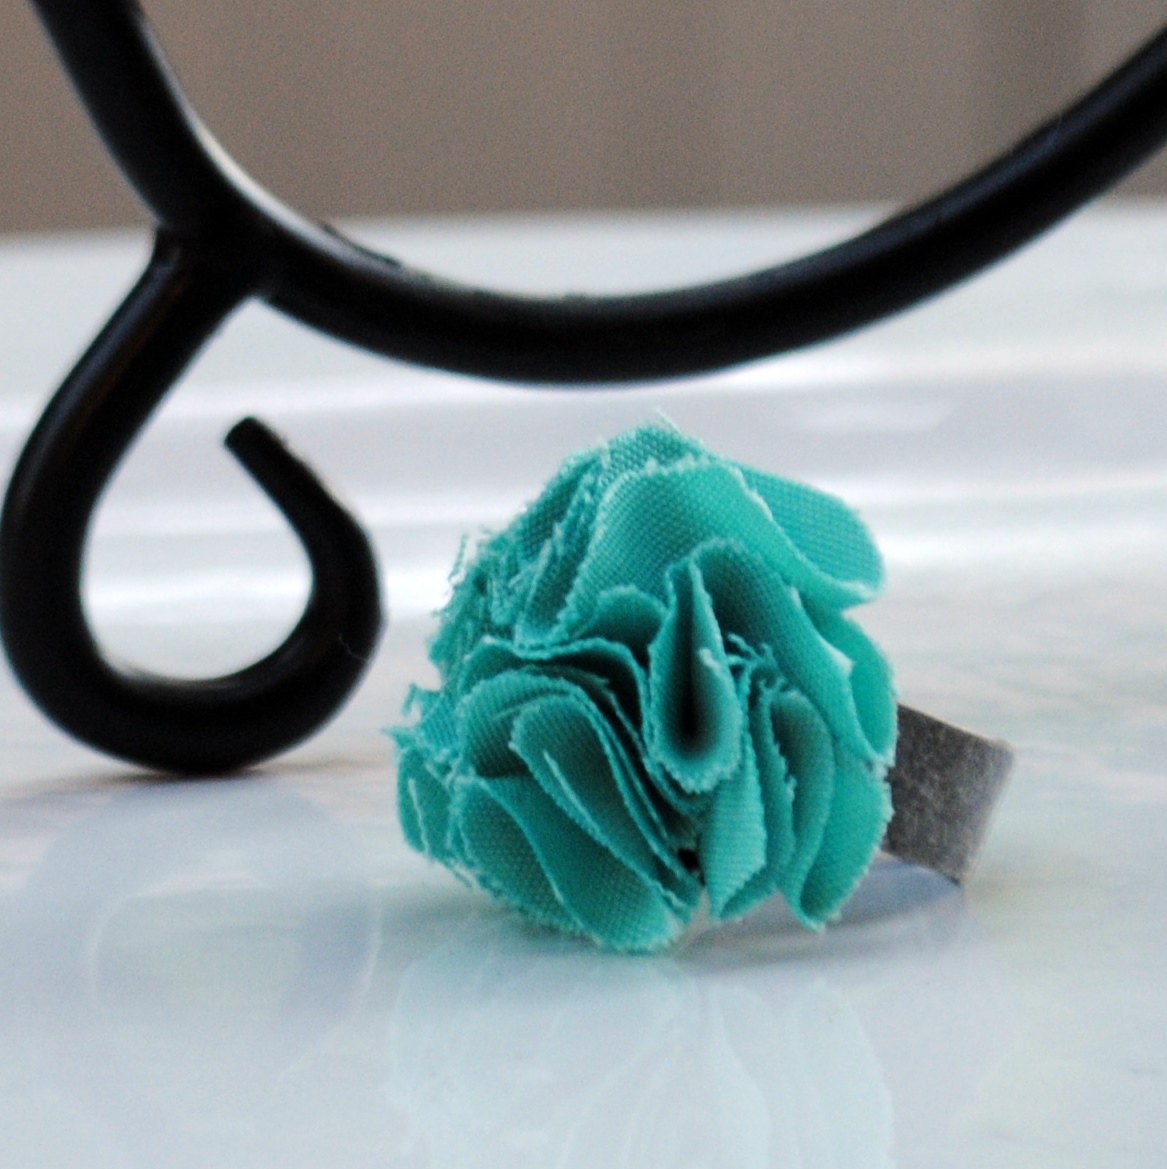
One lucky reader will win this turquoise cocktail ring from the Made By Munchies MamaEtsy Shop


Here is how you enter:
Mandatory - Be a public follower of Made By Munchies Mama & Punkin Heads and Dooda Loo's
Extra Entries:
 
Be a Facebook follower of Made By Munchies Mama & Punkin Heads and Dooda Loo's 

Tweet or Facebook about this Giveaway
 
Please comment on this post for each entry you make
Giveaway will end Monday September 26th at 8pm!
Good Luck!!!

Wednesday, September 21, 2011

Acorns and Ladybugs

I don't know about you, but at my house in the fall we have a ton
of Acorns and Ladybugs. Ridiculous amounts.

They're another one of those things that says "Fall is here" to me.

And just one more thing I get to rake (or vacuum) up!

But, its all good! They're cute and I'll keep them.

So in the spirit of ladybugs and acorns I whipped these
cute little buggers up as a treat for Maddy and her buddies.


The strawberries are SO GOOD.
all the taste of a chocolate covered strawberry turned into a cute little bug.
And the acorns came in handy this week for "fall themed" cupcakes
that I sent off to pre-school with Mads.


To make the Acorns you will need:
1 bag of Hershey Kisses
Frosting or Peanut Butter
Thin Pretzel Sticks
Mini Vanilla Wafers

Start by unwrapping the Hershey Kisses (obviously!).


Place a small amount of frosting on top.


Stick on the Vanilla Wafer


Break off a tiny piece of pretzel.
Dip the end in peanut butter (I didn't like the look of the white frosting)
Stick onto the wafer.

Easy as pie!


For the ladybugs you will need:
Strawberries
Mini chocolate chips

Wash and dry the strawberries.
Then cut off the tops.
Slice the strawberries in half length-wise {You now have 2 "ladybugs"}


Make a slit in the back of the strawberry to for "wings".


In a bowl melt a handful of chocolate chips in the microwave.
Dip the rounded end of the strawberry into the chocolate (this makes the head).
Stick the mini chocolate chips into the strawberry, pointed side in, to make the spots.


Totally cute!

And the acorns make great last minute cupcake toppers...


And don't forget to stop on by Momma's Like Me to meet Lacee
and check out my guest post!
I'm featuring my yummy Pumpkin Roll!


And over on Lena's blog Mom2MemphisandRuby
you can learn some more about me,
and enter to win some of my fab little Halloween clippies!


Have a great Wednesday Everyone!

Tuesday, September 6, 2011

Tidbits of Labor Day and Barrettes for You!

Hi my bloggy buds! I feel like I haven't seen you in forever.
Oh, I missed you so!

I hope you all had a wonderful Labor Day weekend,
and got to enjoy one last little bit of summer fun.

We kept ourselves quite busy this weekend
being out and about, working on the house,
and having play dates with family.
And for the majority of it I managed to forget my camera! Grr!

I did manage to remember it for a few things...
Here's a peek at some of the things Maddy Ry did this weekend:

Lunch at the soccer jamboree for DaDa's team.
A little upset that the big girls were playing and she had to eat.
Nice face huh? Its her signature!


Playing on the turf field with Dada before the jamboree started.


DaDa's future soccer star in the making!


But, life isn't always fun and games
sometimes we need to keep DaDa on track
and help with house renovations.
And, did you happen to notice the BIG GIRL UNDIES??? YES!


Polka dot pedicures with cousins are always relaxing....


Arts and Crafts after a LONG day of playing


Totally excited for going pee pee on the potty all by herself!


Modelling one of the new barrettes Momma made.


This is the best pic I could get of both of them in their barrettes!


The girls even talked me into making a quick bracelet
and got to pick their own fabric...that was interesting.
Please not the key word: QUICK
5 minutes folks, so don't knock the quality!


Huh? You think the barrettes are cute?
Well, here's another peek at my first few attempts.
Or, should I say the ONLY pictures I remembered to take!
{I won't mention that these are the ones I screwed up on}


And since I'm in the barrette, headband and bracelet making kind of mood
I'd love for one of YOU to receive a pack of them!
And, you get to pick your color theme!

It's simple and easy to enter:
Just follow the PHDL blog and leave a comment telling me 
why you need to receive this nifty little package,
and if it's for you or a favorite kiddo.

Bonus entry:
Post a link to the giveaway on your facebook or twitter page
and leave me a comment here with the link back to it.

THE WINNER IS:
Comment # 23 - Susan!
Please be sure to email me at k_dufour@hotmail.com so we can discuss what colors you would like ;)
Congratulations!

Thanks to all who entered!

Care to Share?